How to Block Websites on Router 2024
Block Websites on Router
Are you looking to block websites using your router? I was in the same situation a few months ago, so I understand the need to restrict certain websites.
Sometimes, we aim to boost productivity by avoiding distractions. If you have teens at home like me, you may be trying to protect your kids from harmful content or maybe you are just concerned about your online privacy. Whatever the reason, blocking websites can be a practical solution.
Fortunately, using your router to block websites is easier than you might think. I have tried this method myself and found it quite effective.
In this guide, I’ll walk you through the exact steps to block websites using your router and another more reliable method I am using now to block adult content.
Let’s dive in and make your internet experience safer and more focused.
How to Block Websites on Router Using Router Settings?
Blocking websites on our router can help us control access to certain online content. Here’s how I blocked unwanted websites using my router settings in a few simple steps:
1. Access Your Router Settings
I started by opening my web browser and typing in the router’s IP address.
This address can usually be found on a sticker on the back of your router or in the router manual. It looks something like “192.168.0.1” or “192.168.1.1” or https://myrouter.local.
(Note: if you need help finding your IP address, Check out here)
2. Log In
Next, I logged into my router’s settings using the default username and password.
If you haven’t changed these, they are often set to “admin” for both fields. However, if you are unsure, you might need to check the sticker on the back of your router or your router’s manual for these details.
3. Navigate to Website Blocking
After logging in, I navigated to the Block Sites under the Security section (Advanced > Security > Block Sites).
Again, this location will vary depending on your router’s make and model. However, it could be under the “Firewall menu,” “Parental Controls,” “Access Restrictions,” or “Website Filtering.”
4. Add Websites to the Block List
Once in the website blocking section, I entered the URLs of the websites I wanted to block, like “www.youtube.com.”
You can also add any related domains into the designated field. (youtube.com, m.youtube.com, googlevideo.com, so on). Moreover, some routers let you block entire categories of websites, which can be useful.
5. Save and Apply Changes
Finally, I saved the changes and restarted my router.
This step is important to ensure the new settings have taken effect. In some cases, you might also need to restart your devices.
Some Tips for Best Website Restrictions Using Router Settings
Here are some tips for best restrictions using Router Settings:
- Use a Strong Password for the Router: First, make sure your router has a strong and unique password. This will prevent unauthorized access to your settings, keeping your restrictions intact.
- Keep Your Blacklist Up to Date: The internet is constantly evolving, with new websites appearing every day. Regularly update your blacklist to block any new or potentially harmful sites.
- Monitor and Adjust: Website restrictions aren’t set and forget. Regularly review and adjust your settings based on how the network is used. This ensures your restrictions stay relevant and effective.
- Control Network Traffic: Keep an eye on which websites are accessed most frequently by you, your kids, or others around. This can help you decide which sites to block and refine your restrictions.
- Use a Firewall: Adding a firewall to your network can offer additional protection. It helps keep unauthorized users out and protects your data from malicious websites.
- Opt for a Router with Parental Controls: Some routers come with built-in parental controls. These can simplify the process of setting up and managing website restrictions.
Benefits of Using Router Settings to Block Websites
Blocking websites through your router settings can be quite effective for managing internet access. Here are some benefits I experienced using this method:
1. Universal Control Across All Devices
By making changes in my router settings, I was able to ensure that any device connected to my network—whether it was my PC, smartphone, tablet, or even my smart TV—could not access the blocked websites. What’s more, this also worked regardless of the operating system on different devices, be it Android, Apple, or Windows—the restrictions worked universally.
2. Enhanced Parental Control
My oldest child is just 13 and what he may stumble upon online has always been a big concern for me. But I was able to sort that up using my router’s settings. I was able to gain better control over what my children can access online. I was able to block specific websites that aren’t covered by standard parental control features on individual devices.
3. Boosted Productivity
I noticed that blocking distracting websites at the router level significantly improved my focus and productivity. Since these sites are inaccessible from any device, I am less tempted to check them during work hours.
4. Customizable Restrictions
The flexibility of router settings allowed me to create a custom block list. Due to this, I was able to choose specifically which websites to block and which to allow, tailoring the internet experience to my family’s needs.
5. Scheduled Access
I was able to set specific times when certain websites are accessible. For example, I generally restrict social media during homework hours to help my children concentrate better on their studies.
6. Work Environment Control
Using router settings to block websites helped pretty well in my office as well. In fact, in professional settings, blocking non-essential websites at the router level helped me ensure that my employees stay focused on work tasks.
Where Does This Method Fall Short
Well, as I mentioned above, I did find some great benefits in using router settings to block content, but at the same time, this method did fall short in certain areas:
- Limited Network Protection: The filters only work when devices are connected to my home network. If my kids switch to mobile data or use a different WiFi network, the protection is lost.
- No Real-time Filtering: Well, yes it took me time but I realized that router settings don’t filter content in real-time. They block specific URLs or categories, which isn’t always effective.
- Complex Setup: Configuring the router controls in the first place was quite a task. It was pretty technical and challenging. It’s not user-friendly for someone without tech skills.
- Lack of Additional Features: Router settings don’t provide extra tools like identifying explicit images, URLs, or keywords and restricting them effectively.
So, you see while using the router was a start, I realized I needed a more comprehensive solution. That’s why I turned to BlockerX for better, more user-friendly protection.
Here is how it helped me block unwanted websites.
How to Block Inappropriate Websites with BlockerX?
I accessed BlockerX to effectively block inappropriate websites. Here’s how I did it:
1. Install the App
First, I installed the BlockerX app on my device. For my Android phone, I opened the Google Play Store, searched for “BlockerX,” and clicked “Install.”
If you have an iPhone, you can find BlockerX in the Apple App Store and install it similarly. BlockerX is also available in the Chrome web store for browser use.
2. Create Your Account
Once the app was installed, I opened it and clicked on the register button to create my account. I entered my email address and set a secure password. After verifying my credentials, my account was activated instantly.
3. Block Websites and Apps
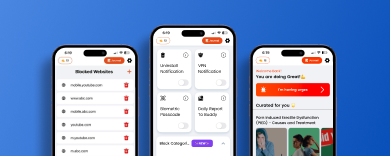
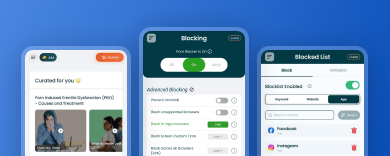
With BlockerX set up, I was able to block unwanted websites by adding their URLs to the block list. I also had the option to block specific apps, keywords, explicit images, incognito Mode Compatibility, and much more!
Benefits of Using BlockerX
The benefits of using BlockerX I found truly worth it:
- Comprehensive Protection: BlockerX works on all devices. This helped me ensure that I have control over what I see online, whether at home or on the go.
- AI-Powered Filtering: The app AI filter analyzes website content to block explicit images, URLs, and keywords, providing protection before I even realize I need it.
- Secure Settings: With removal prevention, I can trust that once I block a site, it stays blocked until I decide otherwise.
- Personalized Support: I found that BlockerX provides the option to create a personalized plan. This, in turn, helps to avoid relapse, with the help of some great features like an accountability partner to keep on track.
- Additional Features: Besides blocking websites and apps, BlockerX includes My Stats, Articles & Video Courses, screen time limits, and compatibility with Incognito Mode, that helps in managing online activity effectively.
These benefits make BlockerX a powerful tool for maintaining control over our online experience, creating a safe and productive environment.
How to Block Websites on Router -FAQs
Q1. How do I permanently block websites on my phone?
One of the most effective ways to block websites on my phone is using reliable apps like BlockerX. It provides great precision in blocking unwanted content ensuring overall protection.
Q2. How do I block websites on Chrome Without Extensions?
You can block websites on Chrome without extensions using a Wi-Fi router, edit host file settings, use apps, and more. (Learn more here)
Q3. Can I block the Instagram app?
Yes, with a social media blocker like BlockerX, you can add URLs to a blocklist and customize your blocking settings.